Sunday, March 24, 2013

Weekly wrap up - Sunday, March 24

It's been another great week here at the Colorado Bead Company!  We were surprised at how many of you braved the Colorado snow to make it to the Wire Wrapped Bracelet class on Saturday and how many friends stopped in to pick up supplies!  It was a great day for jewelry making.  

Projects we've been working on:


A wire wrapped necklace with tiny sapphire beads.

Metal stamped Mother's Day pendants with birthstones.  
We will be having a class teaching you how to make these in early May.
Keep an eye out for more details.


Aimee made this really cute necklace for a friend with one of the clasps
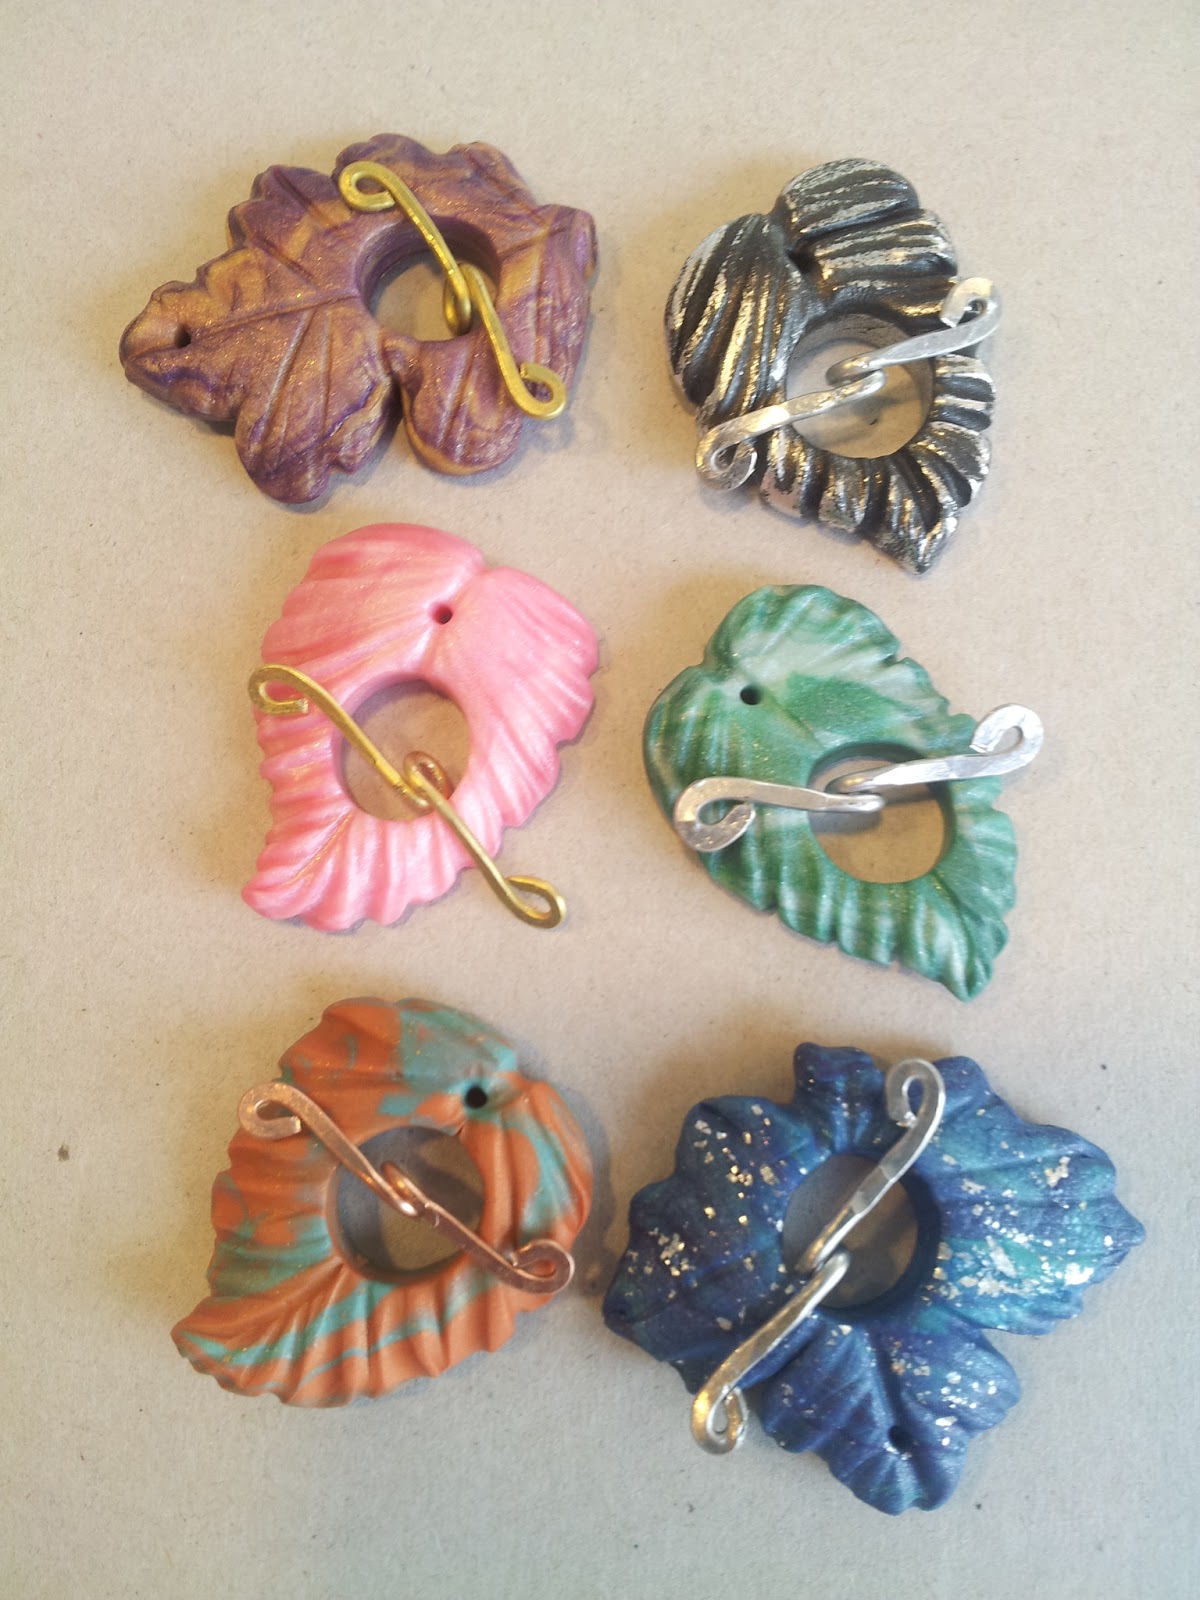
we just got in from BeeTree by m.e.  This clasp is meant to hang as a pendant.
Do you want to learn how to make a beaded necklace?  Check out our Foundations classes.


New inventory:


Other stuff:

We're working on the May schedule, so hopefully it will be out soon.

Spring happened!  Well, the first day of Spring happened... and then it snowed.  We put together a great board on Pinterest for some Springy pinspiration for your crafty selves.  Check it out!   

The cutest Pomeranian came in too!  Her name is Honey.  

We also made some new name tags for classes.  :-/  My painting skills are not that great... unless getting paint everywhere was the goal... it wasn't. 

Saturday, March 23, 2013

How to make name tags with chalkboard paint


If you've taken classes with us, you know that we like to know you.  Everyone gets a nice little name tag, it helps so that the instructors don't just shout at the end of the table "hey you, with the the beads... and wire... yah you!"  We've been using Post It notes, but that's so wasteful.  We decided to come up with something that reusable... and cute.

Thanks to Pinterest, we decided to go with chalkboard paint!  Reusable and cute!  Both things we love.

Supplies:
  • 10 wood pieces
  • chalkboard paint
  • paintbrush
  • decoration
  • E6000 (a hot glue gun would probably work too)
This project is fairly self explanatory.  However, the How To's:
1 - Prep your work surface.  I used random scrap paper we had laying around.
2 - Follow the directions on your chalkboard paint.  Ours said to shake well, apply two coats:  one vertically and one horizontally (I did two each direction, you know... more is better right?)  Dry one hour between coats (which I did not do).  Let cure 24 hours.  Lightly rub chalk over surface to condition (I have no idea what this meant really, I didn't do it).  Water cleanup.
Why water cleanup is important...


3 - Then get to painting.  Which I did.  I have a lot of skills in life, a lot of great skills.  Apparently painting is not one of them.  Oh well!  Water cleanup, right!

4 - Wait until dry.  

5 - Use glue to affix your fancy little decorations.  I used fabric flowers I found and some beads.  I used a little glass owl for the "instructor's" name tag, you know, because we're the instructors!  And owls are smart.  


Ta da!  Super easy.  Super cute.  We've been using them for about a week now and they're working beautifully!  I'm really happy with how they've turned out.

Ready for class!

Thursday, March 21, 2013

New clasps from BeeTree by ME

Just in!  Over 20 swoon inducing polymer clay toggle clasps from Mary Ellen at BeeTree by m.e.  We're SO happy to be able to price these clasps at $5.50 each.  They're a great way to enhance your pieces.  Maybe use them as an asymmetrical piece?  A front clasp/pendant?  SO MANY IDEAS!


You can catch her blog or visit her Etsy shop to see more of her unique designs!  

Love these?  Come in soon before they all disappear!

Monday, March 18, 2013

New pendants from Singing Cat Studio

We just got in a special delivery of beautiful polymer pendants from our friend Kim with Singing Cat Studio out of Philadelphia.  These lovely little pendants are decorated with fun mixed media pieces - metal or ribbon with bails for stringing.  They're wonderful on beaded creations but they're also very nice on a simple ribbon necklace.


Stop in and decide which one you can't live without!

You can visit Kim's Facebook page and see more of her beautiful creations! 


Tuesday, March 12, 2013

A wedding necklace - a keepsake memory

Is it almost wedding season already?!  Apparently!  We've started getting a sprinkling of brides, bridesmaids, and jewelry designers looking for inspiration and supplies to create their own beaded wedding jewelry.  

This afternoon a wonderful woman named Allison came in.  She brought with her quite the ziplock bag of her grandmother's old jewelry.  Some the pieces were costume pieces, very glitzy and sparkly, and others were her grandmother's old pearls, a treasured piece of jewelry in most families.  I know mine are, anyways.  


Allison is getting married in August and is planning to transform her grandmother's necklaces into a beautiful, large necklace and bracelet to wear down the aisle.  She also wanted to add in new beads to tie it all together.  Her bridesmaid's dresses are kind of a blue/teal/turquoise color.  She told me that she's done a little bit of crafting and necklace stringing, however not in a while and nothing too labor intensive.  I love projects like this!  I'm so excited for her.  As we talked, I got to know her a bit more and found out a little more about what she's looking for in a necklace.  


One of the things she mentioned was wanting a large, show stopping piece for the wedding but not knowing what to do with it after the wedding.  Solution: use a spacer bar and lobster clasps with split rings.  Each necklace will basically be an individual necklace that will be "temporarily" attached to the final piece with the spacer bars.  After the wedding, she'll just remove each necklace from the spacer bar and will have several pieces she can wear, one, two, three at a time.

Supplies needed to do this:
  • spacer bars
  • lobster clasps (for attaching individual necklaces to the spacer bars
  • lobster clasp (for the spacers bars to actually put the necklace on for her wedding day)
  • crimp tubes - she went with 2mm x 2mm sterling silver crimps
  • beading wire - a medium weight wire is best for the mixed media project
  • bead board - because she's making several pieces, she'll want to make sure they all measure out correctly
  • and her beads, of course
I'm so excited for her updates on this project.  I { love } the idea of re-purposing her gram's old stuff.  :)  I bet she's going to do an incredible job!  (Allison, if you're reading this, don't forget to come back in and give us updates!)

{ love } + beads,
Anne.

Thursday, March 7, 2013

New Inventory - funky cabs, cufflink backs, connectors

Whooo!  New stuff!  I love when new bits and pieces and goodies come in.  

 Fancy cufflink backs - I just love cufflinks

 swirl and twig connectors, these are VERY cool

 shell pendants

 leaf connectors, we have both the left and right facing ones

Awesome new cabochon pairs - we've had these before and are excited to have them back in stock

more cabochons, these are quite a bit larger, 40x30mm (the skulls are amazing!)

filigree ring backs/blanks - we've had these before as well, they're quite popular because the quality is really nice, they're heavy and hold up incredibly well.

Such happy bits!  -Anne.

Saturday, March 2, 2013

DIY wrapped bracelet with ball chain - hmmm...

In the last few weeks we've had almost a dozen people come in to get supplies for these leather wrapped bracelets with ball chain and hemp from Honestly WTF.   And we've been all "honestly?  WTF are these people up to!"  So we decided to give this little tutorial a try.  Well, Sarah did...


I used hemp instead of wax linen and it worked great! I also used a bead instead of a hex nut for the clasp.  Make sure the hole of the bead is large enough so the leather cord when it's doubled will fit through it. I used a silver ball chain but we have over 20 different colors!


The tricky part is making sure both leather cords and the ball chain stay straight when you are wrapping them with the hemp so it doesn't end up twisted.  Make sure you pay attention to whether your cords are beginning to twist.  Also the tutorial didn't say whether the ball chain should go on top of the leather cords together or whether the ball chain needed to go in between the cords.  When I did it, I put the ball chain on top of both cords, so it was like a three high stack.  Looking back, I think it maybe should have gone between them, like a triangle with the leather at the bottom and the ball chain as the top part.


My first try wasn't the most successful, but I would definitely give it another try.  I hope these tips were helpful!

Happy beading!

~Sarah~